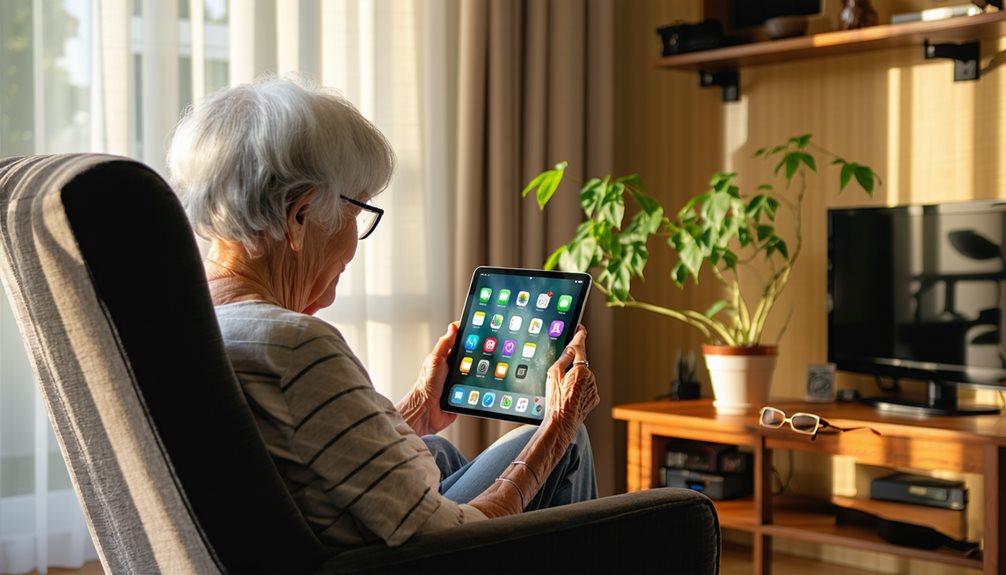
When it comes to making iPads more user-friendly for seniors, the key is to tailor the device to meet their specific needs. Start by diving into the accessibility settings. With a few simple tweaks, you can turn an iPad into a more intuitive tool for seniors.
Imagine the ease of enlarging text, enabling spoken feedback, and simplifying navigation—all achievable with just a few taps. Curious how these small changes can have a big impact? Let’s explore this together.
You can think of accessibility settings as a toolkit. It’s like having a personal assistant to make technology less daunting. Adjusting font sizes ensures that reading becomes a breeze. Activating voice feedback is like having a helpful narrator guide you through the device.
Simplifying navigation? It’s akin to having clear signposts on a walk, making sure you never lose your way.
These adjustments may seem minor, but they can significantly enhance the iPad experience for seniors. Consider it a bit like upgrading to a more comfortable pair of shoes. Suddenly, the journey feels easier and more enjoyable.
Are you ready to see how these settings can make a difference? Let’s dive in and discover the possibilities together.
How to Set Up an iPad for Seniors?

To set up an iPad for a senior, start by customising essential settings like text size and contrast to make everything easier to see. Next, guide them through creating an Apple ID, ensuring they can access important apps and services. Don’t forget to enable accessibility features such as VoiceOver and Zoom to enhance their overall experience and usability.
Essential Initial Settings to Customize
When setting up an iPad for seniors, start by ensuring the device is updated to the latest version of iOS, which guarantees security and access to the newest features. Next, set up assistive access by steering to accessibility settings. Enable larger text and VoiceOver for reading support. Organise the home screen with essential apps. Use Guided Access to lock the device to a single app, enhancing focus.
Step-by-Step Guide to Creating an Apple ID for Seniors
Creating an Apple ID is an essential first step in setting up an iPad for seniors, giving them access to a wide range of features and services. Start in the Settings app, select “Create Apple ID,” and enter necessary details. Choose security questions and remember login information. Customise account settings by adding trusted contacts. This guarantees a secure, personalised experience with the iPad for a senior.

Must-Enable Accessibility Features for a Better Experience
While setting up an iPad for seniors, it is crucial to enable accessibility features that enhance usability and comfort. Start with VoiceOver for spoken feedback, and use Zoom to magnify the screen. Adjust display and text size by enabling bold text for readability. Implement Speak Selection for text-to-speech functionality. Utilise the Accessibility Shortcut for quick access. Consider the touch accommodation feature for customised touch responses.
What Accessibility Settings Can Improve iPad Usability for Seniors?

To make iPads more accessible for seniors, start by adjusting the text size in the Accessibility settings for easier reading. You can also use the Zoom feature, which allows you to magnify on-screen content for better visibility. Additionally, enabling VoiceOver will help navigate the device through spoken descriptions, making it easier for those with vision impairments.
How to Adjust Text Size for Easier Reading
One simple way to make reading easier on an iPad for seniors is by adjusting the text size through the Accessibility settings. In the settings menu, you can increase text size up to 36 font. Enable “Bold Text” for enhanced readability, and activate “Larger Accessibility Sizes” for oversized text. Adjust contrast and reduce transparency to make text easier to read against backgrounds, ensuring maximum clarity.
Using the Zoom Feature for Better Visibility
The Zoom feature on iPads is a powerful tool that markedly improves visibility for seniors with visual impairments. This accessibility setting acts as a zoom and magnifier, allowing you to increase the size of on-screen content. Simply triple-tap with three fingers to activate it. Customise the zoom settings to your preference, ensuring useful features like full-screen view enhance your visibility, even with poor eyesight.
How to Enable and Use VoiceOver for Navigation
While the Zoom feature enhances visibility, another powerful tool for seniors is VoiceOver, which offers spoken feedback to make navigation easier. Enable it by going to Settings > Accessibility > VoiceOver, or triple-click the button. Navigate the touchscreen using swipes and double-taps. Customise speech rate, voice, and verbosity to suit your needs. The Rotor feature lets you quickly adjust settings, ensuring seamless accessibility.
How to Customize the Home Screen for Seniors?

To make the iPad home screen more senior-friendly, start by arranging apps in a simple 4×4 grid to keep everything easily accessible. Create helpful shortcuts for commonly used features to simplify navigation and save time. Additionally, consider setting up Guided Access to guarantee focused and safe use, preventing accidental taps or app switches.
Best Ways to Arrange Apps for Easy Access
One effective way to arrange apps for easy access on an iPad is by limiting the home screen to a 4×4 grid of essential apps. This layout reduces confusion for seniors by keeping the main home screen focused. Increase the icon size in accessibility settings to enhance visibility. Use folders to organise similar apps, and move less-used apps to secondary screens, ensuring a streamlined experience.
Helpful Shortcuts to Simplify iPad Use
Customising the iPad home screen can transform a senior’s experience by simplifying navigation and boosting confidence. To make the iPad easy for seniors, go to settings and adjust the icon size for better visibility. Organise apps into folders on the home screen to reduce clutter. Employ accessibility settings to guarantee ease of use. This streamlined approach enhances a senior’s ability to independently navigate their iPad.
Setting Up Guided Access for Focused and Safe Use
Release a smoother iPad experience for seniors by setting up Guided Access to enhance focus and safety. Activate this feature in accessibility settings to focus on a single app and customise restrictions. Simplify the home screen by removing unnecessary apps and arranging frequently used ones with larger app icons. Use the accessibility shortcut for quick access, streamlining the user experience and ensuring ease of use.
How Can Siri Benefit Seniors on an iPad?
To make the most of Siri on your iPad, start by setting it up to recognise your voice and customise its settings. Once you’re set up, you’ll find Siri’s commands useful for easy navigation, such as making calls or sending messages hands-free. Additionally, Siri can enhance accessibility by integrating with features like VoiceOver, offering assistance to those with mobility or vision challenges.
Step-by-Step Guide to Setting Up Siri
Getting Siri set up on your iPad is straightforward, offering seniors a hands-free way to interact with their device. Start by directing yourself to Settings > Siri & Search. This accessibility feature simplifies tasks through voice commands, allowing seniors to send messages, make calls, and set reminders effortlessly. Siri’s integration with iPad features empowers seniors, enhancing usability and making daily interactions more intuitive and efficient.
Useful Siri Commands for Easy Navigation
Imagine having a personal assistant at your fingertips; that’s exactly what Siri offers seniors using an iPad. With simple voice commands, you can effortlessly make video calls, send messages, or set reminders. Siri enhances accessibility by managing daily tasks, providing entertainment through music or podcasts, and conducting web searches. This hands-free experience empowers you to navigate your device with ease and independence.
How Siri Can Assist with Accessibility Features
Although manoeuvring technology can be intimidating, Siri makes it easier for seniors to use accessibility features on an iPad. Activate Siri by voice or button to enable VoiceOver, Zoom, and Speak Screen, providing voice guidance and content reading. Adjust text size and visibility quickly, enhancing comfort for visual impairments. Create voice shortcuts, simplifying interactions and ensuring a seamless experience for staying connected and engaged with technology.

How to Use the Magnifier Feature on an iPad?

To make the most of your iPad’s Magnifier feature, start by enabling it through Accessibility settings, allowing you to quickly activate it with a triple-tap. You can customise its settings to suit your needs, adjusting magnification levels, filters, and brightness for ideal viewing. This feature is perfect for reading menus or labels, offering convenience and independence in everyday situations.
Understanding the Magnifier and How to Access It
When you need to enlarge small text or objects on your iPad, the Magnifier feature is a handy tool that transforms your device’s camera into a digital magnifying glass. To access it, navigate to Settings > Accessibility > Magnifier and toggle it on. This feature is perfect for an elderly relative who needs help reading. You can adjust brightness and apply colour filters for enhanced clarity.
Customizing the Magnifier Settings for Individual Needs
Customising the Magnifier settings on your iPad can dramatically improve its usability for individual needs. Immerse yourself in the accessibility options to enhance your reading experience. Adjust the Magnifier’s settings to suit your vision by tweaking colour filters, contrast, and brightness. You can zoom up to 15 times, freeze images for easier reading, and switch between full-screen or lens view, ensuring ideal customisation.
Everyday Uses of the Magnifier for Seniors
An iPad’s Magnifier feature transforms its camera into a versatile tool for seniors, making everyday tasks much easier. Use it to enlarge text on medication bottles or read restaurant menus with ease. Adjust magnification up to 15x, customise colour filters for better contrast, and illuminate dark areas with the torch. This accessibility tool empowers seniors to tailor their iPad experience to their vision needs.
How to Manage Screen Time and Notifications for Seniors?
To help seniors maintain a balanced experience on their iPads, you can set up Screen Time restrictions and establish daily app limits. It’s important to customise notifications to reduce distractions by prioritising essential alerts and silencing unnecessary ones. By managing these settings effectively, you can guarantee a more focused and enjoyable interaction with the device.
Setting Up Screen Time Restrictions for a Balanced Experience
When setting up screen time restrictions for seniors, it’s crucial to strike a balance that supports both connectivity and well-being. Utilise Screen Time settings to monitor usage, customising notifications to reduce distractions. Enable app limits and Downtime to encourage breaks. Family Sharing offers a way to manage these settings, aligning the senior’s digital habits with their health goals and maximising accessibility.
Best Practices for Managing Screen Time and Usage
Effectively managing screen time and notifications for seniors can greatly enhance their digital experience. Set daily screen time limits to encourage balanced usage and monitor app usage through the “Screen Time” feature. Activate “Do Not Disturb” to reduce distractions during essential hours. Adjust notification settings to maintain comfort levels, ensuring the device remains a helpful tool rather than a source of stress.
Customizing Notifications to Reduce Distractions
Managing notifications effectively can make a big difference in reducing distractions for seniors using iPads. Start by customising notifications in the settings; adjust alert styles and enable “Do Not Disturb” for focused time. Use Screen Time to set app limits, ensuring balanced usage. Opt for “When Opened” notification previews, and organise alerts with Scheduled Summary, all of which help streamline information and minimise interruptions.
Final Thoughts
With just a few tweaks, you can transform an iPad into a senior-friendly gadget. Dive into the accessibility settings to make the text larger, turn on VoiceOver, and use Zoom. These features boost readability and make navigation a breeze. Organise your home screen with bigger icons and simple folders to keep things straightforward. And why not let Siri lend a hand? With voice commands, tasks become hands-free, making life a tad easier.
These adjustments mean seniors can enjoy a more accessible and enjoyable experience. It’s like giving them a remote control for everyday tasks, making them not only simpler but also more engaging.
Frequently Asked Questions
Q: How can I make an iPad accessible for seniors who find it difficult to use?
A: You can make an iPad accessible by adjusting the accessibility menu settings. This includes changing the display and text size, enabling the screen reader, and simplifying the home screen by organizing apps that are frequently used.
Q: What are the steps to set a passcode on the iPad for security?
A: To set a passcode on the iPad, go to Settings, tap on Face ID & Passcode or Touch ID & Passcode, then select “Turn Passcode On.” Follow the prompts to create a passcode that is easy to remember but secure.
Q: How can I change the display and text size on an iPad for better visibility?
A: You can change the display and text size by going to Settings, then Accessibility, and selecting Display & Text Size. Here, you can adjust text size, enable bold text, and reduce transparency for easier reading.
Q: What features can help seniors using the iPad Pro for communication?
A: Seniors can use the iPad Pro’s FaceTime for video calls and iMessage for texting. Adjusting the accessibility settings can also help make these apps easier to navigate and use.
Q: Is it possible to simplify the apps on the home screen for easier access?
A: Yes, you can simplify the apps on the home screen by organizing them into folders or removing unnecessary apps. This makes it easier for seniors to find the apps they use most frequently.
Q: How can I reduce the white point to make the screen easier to read?
A: To reduce the white point, go to Settings, then Accessibility, and select Display & Text Size. From there, you can adjust the White Point setting to make the screen less bright and easier on the eyes.
Q: What is the benefit of using the screen reader feature on the iPad?
A: The screen reader feature, known as VoiceOver, reads aloud the content displayed on the screen. This is particularly helpful for seniors who may have difficulty reading text and can assist them in navigating the iPad effectively.
Q: Can I set up trusted supporters to help manage an iPad for a senior?
A: Yes, you can set up trusted supporters by sharing the iPad’s Apple ID and iCloud account information. This allows them to assist with app management and troubleshooting when needed.
Q: How can I access Apple Support for further assistance with accessibility features?
A: You can access Apple Support by visiting their website or calling their support line. They provide detailed information and assistance on how to make an iPad more accessible for seniors.
Q: What should I do if the iPad is still difficult to use even after making adjustments?
A: If the iPad remains difficult to use, consider exploring additional assistive technologies available through the accessibility menu, or consult with a trusted supporter to assess the specific needs of the person using the iPad.


